Friday, July 2, 2010

Making a wild yeast levain and a Book Review of 52 Loaves


http://www.amazon.com/52-Loaves-Relentless-Pursuit-Meaning/dp/1565125835


http://www.williamalexander.com/ (the author's blog - includes recipes)

I heard about this book on another blog and thought it sounded worth reading. It is! The book is a non-fiction story about the author's attempt to re-create the "perfect" loaf of bread that he ate ~10 years before our story starts. He decides to make at least one loaf of bread a week for a year to try to do this. He bakes bread in various places around the world and learns from bakers... and also grows his own wheat and makes his own clay oven.

Alexander is an entertaining writer, including lots of interesting facts and details about bread, many of which I didn't know even though I've been baking homemade bread for probably almost 20 years. But he never loses sight of the story part of it (part memior) and it is funny at times and generally hooks you into the story!

He convinced me that I needed to bake more with a sourdough starter (a levain). As he says on his website: "Levain, sourdough, starter...call it want you want — it is the secret to authentic, yeasty, artisan bread. San Francisco sourdough has, in a sense, given all sourdoughs a bad name, but most wild yeast starters are far milder and (to my palate) more pleasant as well."

This convinced me to try to make a levain with wild yeast. I also think San Francisco sourdough bread is a little too strong for my taste, and when I've made starter before I've always used purchased, commercial yeast, so I'm anxious to see what the wild yeast starter is like.

I've started mine! Alexander recommends using orchard apples (the 'haze' on them is the yeast) so I thought I'd have to wait until fall for apples to be ready. But when we were at the farm last weekend Grandpa asked if we wanted apples! His neighbor or friend had a tree with "sauce apples" that he was trying to get rid of. Mom and Grandpa went and picked some.

I used a lot for making applesauce, but I saved one whole apple cut up into 1" chunks and the peel of a second to put in 1 c. de-chlorinated water. It has been sitting, covered, on my counter for almost the full three days (I've been stirring it at least twice a day) and already it is bubbly and smells like apple cider (and a little like vinegar... hopefully that's okay). I start "feeding" it with flour tomororw, so I'll keep you posted on how that goes and how it is to bake with! If it works and makes tasty bread, I'd be happy to share some starter with you if you want some Brown County wild yeast levain. Or, you can make your own, so far it seems pretty easy!

Alexander really recommends you use a scale when you bake. While, as a scientist, I understand that sentiment, I'm not sure if we'll get one or not. It seems like it's just one more item that may not get used enough to justify taking up precious real estate in my kitchen. If we want to follow any of his recipes though, a scale might be needed. He only posts them in metric weights. (This includes his levain recipe...) A few tips about bread making from the book would likely make any bread recipe better, however. (Soon I will post a recipe for "One Hour Bread" - a non-levain using bread that is great for instant gratification. It's even faster than a bread machine!!)

If you're looking for a good summer reading book, find a copy of 52 Loaves soon! Read while eating homemade bread, for the best experience.

(Legal note: A library copy of this book was read. This is not a popular enough blog that authors and companies send free stuff to so that it will be written about and our vast audiences will rush out and buy book or item. The author of this blog post wishes to state that she has no conflicting interests, and will have no material gain from the sale of this book, the making of levains, or the purchase and use (or not) of a kitchen scale.)

Sunday, June 13, 2010

Roasted Red Pepper Chickpea Dip


As I was making this recipe today, I thought it would be a good one to share! This is just a great chickpea dip that's easy to make (less than 10 minutes total) and is good as an appetizer or afternoon snack at work.

Ingredients:

2 cans chick peas (garbanzo beans) (15 ounces), drained
  • 1 small jar roasted red peppers (6 ounces), drained well and coarsely chopped
  • 1/2 lemon, juiced
  • 2 cloves garlic, cracked away from peel
  • 4 stems fresh rosemary, leaves stripped from stems
  • Coarse salt and freshly ground black pepper
  • 2 tablespoons extra virgin olive oil (EVOO), eyeball it as you drizzle it into recipe
  • 1 package flat breads, Everything flavor
  • 1 pint grape tomatoes, rinsed
  • 1 zucchini, sliced into 1/4-inch disks
  • any other veggies or other dipping items - I like baby carrots and red pepper strips.

  • Combine chick peas, roasted red pepper, lemon juice, garlic, rosemary, salt and pepper in a food processor. Turn the processor on and stream in two tablespoons olive oil. Process until smooth.

    Monday, February 22, 2010

    Gingersnap cookies I

    Ever since Josie brought her amazing gingersnaps to our house several months ago I have been wanting to make them. They were so good!! Unfortunately, right around the time I asked her for the recipe she started being sick all the time due to a little one that Claire is getting excited to meet in June. (Claire's babysitter is also expecting, so the topic comes up a lot. Today Claire asked me: "do you have a baby in your belly, too?" No, just a few too many bowls of ice cream, Claire.)

    Anyway, I'm still hoping that sometime Josie will share her great gingersnap recipe, but in the meantime, I tried a recipe from Simply recipes.com. I made it pretty much exactly to her instructions, except that I only made half a recipe (in case I didn't like them... though not too much chance of that) and then I rolled them into a (somewhat lumpy) log and then in raw sugar before freezing the log.

    Tonight I cut off several thin roundish cookies and just finished baking them for 8 min. Couldn't be easier, really.

    And... they are really, pretty good! they are thinner than Josie's, but they are crunchy like hers, which is a must for me. I like all my cookies crunchy (feel free to disagree in the comments, I know not everyone agrees!) but especially gingersnaps! I think I still like yours better, Josie, they were a little more substantial, while still crunchy, and I REALLY loved the raw sugar all over yours, instead of just around the edges like these were.

    Maybe sometime there can be a Gingersnap Cookie II post??? :)

    Tuesday, December 29, 2009

    Toffee Making Novel

    I was determined this year to make toffee, for several reasons. First of all, it's so good. Yum! Second, I tried making it years ago and all the butter separated out and it was terrible. I pretty much hate failing at anything, but it has especially bothered me all these years that a simple recipe beat me. It's just a recipe! It shouldn't be that hard! Why didn't it work? What went wrong? Was it the recipe? Was it me?

    So really, this journey to make good toffee is really more about revenge for long ago kitchen grievances even more than just wanting some toffee. Despite discouraging stories from relatives (hi aunt Jane!), I was determined to not let the toffee beat me.

    I scoured the internets looking for recipes and, most importantly, research on the science of toffee and candy making in general. I learned in grad school that if things aren't working right, you better know WHY everything in your experiment (recipe) is there, because only then can you troubleshoot and figure out what ingredient or procedure might be going wrong or tweak things to make them work better. So I was looking for answers to questions like: why do some toffee recipes have corn syrup and others don't? Should you stir toffee as you cook it or not? Why does butter separate out from the sugar? Why is there water in the recipe? What is the scientific molecular structure of a piece of toffee anyway?


    Turns out, sugar chemistry is a $%"@#&, which is why I leave it out of my Cell and Molecular Biology class, and basically people don't know all that much about what's going on scientifically to the molecular structures of the sugar, so I can't share that with you all. I'm sure you're terribly disappointed... (ok, so I didn't look really hard in real scientific sources - it is my vacation, after all and I knew you all wouldn't mind.) But I did find a few helpful websites in my search:


    This guy does seem to be a toffee expert and to know what he's talking about. So I picked up several things from his secret toffee tips: 1) the procedure is just as important as the recipe, 2) age your toffee a week before you eat it for better taste/texture --- easier said than done! and 3) keep your toffee in the refrigerator or freezer. However, I wasn't a fan of his toffee recipe. I didn't feel like trying to find 'soy lecithin' and it annoyed me that you would have to weigh your ingredients. While I don't doubt that it is better to weigh ingredients rather than just measure normally, I don't have a scale at home, just in the lab, and I'm not about to weigh my food on the same lab scale I use for toxic and cancer-causing compounds. Besides, my lab scale only works in metric.


    Knowing a little bit more about what I was going for, but still having no actual recipe, I decided to check a favorite food blog (101 cookbooks) to see if she had ever made toffee. I was in luck! And, not only did she have a recipe for Toasted Pecan Toffee, but she wrote about failing at another try of making toffee also, when she tried to modify the recipe to make it more 'natural.' So this, and a few of the comments convinced me that I should use a recipe with corn syrup - it seemed to be more likely to work. (My old recipe years ago that was a major FAIL did not have corn syrup in it.) I was pretty convinced this was going to be the toffee recipe I tried to make first. But still I didn't feel like I had a good enough grasp on the process of making the toffee, so I kept searching.


    And then I found a baking 911 site dedicated to toffee! It had good answers to most all of my questions and after reading it, I finally felt like I knew what I had to do when making my toffee to make it turn out! I won't repeat all the tips here, but I would strongly suggest you read their site if you give toffee making a try. (Just don't try searching for their 'perfect toffee' recipe - it got moved and it appears to be only available to paying members.)

    A few other clues on the baking 911 site also made me think my 101 cookbooks recipe was a good one - corn syrup and water both seem to be pretty important, as well as using salted butter - good to know! So now I was ready to cook! (finally, I'm sure you're thinking!)


    I still wasn't confident enough in my recipe to toast pecans and go to that work (or worse, waste the nuts) if the toffee didn't turn out, so I decided to make the 101 cookbooks toffee plain.


    So, I melted in a medium saucepan:


    1 c. of butter, cut into pieces

    Then I added:

    1 1/2 c. white granulated sugar

    3 T. corn syrup (Karo brand, though often we have a generic on hand... maybe it matters, maybe not)

    3 T. water

    And then I cooked on medium heat (I have an electric stove), stirring pretty constantly. And stirring slowly, not quickly. I was suprised that the toffee as it was cooking did not boil up very high, I was actually thinking that my pan was going to be too small and I was going to be chipping toffee off my stove, but it didn't boil up very high at all. I used a 'fake' wooden spoon made out of that stuff that looks like plastic but won't melt until it gets to be 500 deg or something crazy like that. (Maybe that matters, maybe not.)


    Here is a picture of the pan and spoon I used:


    It took forever to cook, probably close to an hour of stirring slowly (the second time I made it, I actually timed it and it was about a 30 min process - I guess it just seemed like an hour). The mixture was a little thick and the bubbles sort of looked like lava lamp bubbles, so I wouldn't necessarily recommend doing this while very tired. You might wake up to the smoke detector sounding the alarm of your burnt toffee because you were lulled asleep by the bubbles.


    Finally, it reached 300 deg F and that's when the recipe said it was supposed to be done. So far, so good, it seemed to be all one substance, lacking a distinct pool of liquid butter on top or anything like that. I have a tendency to overcook candy (ask Will about my chunk of teeth-extracting caramel) just because I'm afraid it's not done enough. But this time I just went for it and poured it onto a sheet of waxed paper lining a cookie sheet. I spread it pretty thin (probably a little too thin) and it took up about all the pan (a jelly roll pan, actually.)


    And then I waited for it to cool so I could try it.


    When it finally seemed cool, it still didn't look like any separationg had happened, and when I broke a piece off, it seemed crunchy like toffee is supposed to be...


    And it was good! Yum! I had made edible toffee! Here is a picture:


    I decided to put chocolate on it. Mostly because Will said he'd probably eat more of it if there was chocolate on it. And I didn't want to be the only one eating it in my house (remember - two sticks of butter AND 1 1/2 c. of sugar in there!) Here are pictures of that and of the toffee all broken up:


    Evaluation: it is good! The recipe seemed easy enough and it worked! I probably spread it a little too thin. And yes, it is better several days after making it, at least in Will's opinion. He actually mentioned yesterday that he thought the toffee was better than when I first made it, and he didn't know the secret tip about aging your toffee for a week before eating! I didn't trust my judgement on that issue since I knew it was *supposed* to taste better, so I wasn't an objective evaluator.


    I wanted to try it one more time, though. For two reasons. One, just to make sure it wasn't a fluke that it worked and I'd never be able to get it to work again. And two, because the toffee seemed a little on the light side, colorwise, and I'm wondering if I really should have cooked it just a little longer.


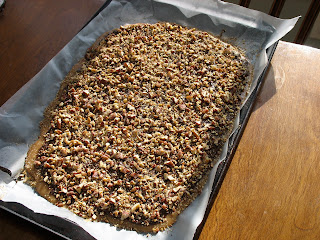
    So today I made it again. This time with toasted pecans, like the 101 cookbooks recipe calls for. (except I only put the chocolate/pecans on one side, not both). It is also very good! Toasted pecans are a good addition. I cooked it to 305 deg F this time, and the color does seem better this time. The "soy lecithin" guy's recipe is to cook to 310-315, so I think I could even go a bit higher without scorching it, but 305 seemed to work fine for me. (*Note: I did NOT test my new $10 digital candy thermometer from Target before using it* I'm not sure why, too lazy I guess - it seemed too much like lab work.)


    Here are a few pictures from today's toffee:


    Don't just take my word for it that it's good. Stop by and I'll give you a piece or two! (see you tomorrow Jane and Laura!)
    If you like toffee and you like candy making and don't mind a half an hour of meditative stirring, I'd encourage you to give toffee a(nother?) try. I'd love to hear about your experiences if you try this recipe.


    Saturday, December 12, 2009

    Caramel Apple Pecan Pie

    This is good. Real good.

    Caramel Apple Pecan Pie
    (from “Pie” by Ken Haedrich)

    Pie Crust of your choice (Our favorite)
    12 caramels, each quartered-48 pieces

    Filling:
    7 cups peeled, cored, sliced apples (I used 1/2 golden delicious and 1/2 granny smith)
    1/2 c. firmly packed light brown sugar
    1 T. lemon juice
    2 T. granulated sugar
    1 T. cornstarch
    1/2 t. ground cinnamon
    1 t. vanilla extract

    Topping:
    3/4 c. all purpose flour
    3/4 c. pecan halves
    1/2 c. granulated sugar
    1/4 t. salt
    6 T. cold unsalted butter cut into 1/4 inch pieces

    Caramel and garnish:
    3 T. unsalted butter cut into pieces
    1 T. water
    36 caramels
    Large handful of pecan halves
    1/2 c. chopped pecans

    Prepare crust and place in 9.5” pie pan
    Sprinkle with 12 caramel pieces and keep cool (fridge) while preparing the filling

    Combine apples, brown sugar and lemon juice in a large bowl, mix and set aside for 10 minutes to juice. Mix sugar, cornstarch and cinnamon together and stir into apples along with vanilla. Scrape into crust and bake for 30 minutes at 400F.

    Make crumb topping by combining flour, pecans, sugar and salt in food processor. Pulse processor a few times, add butter and mix again until in fine crumbs. Refrigerate until ready to use.

    Remove pie from oven and reduce temp to 375F. Dump the crumbs in the center of the pie and spread evenly. Tamp them down lightly. Return to oven. Bake until juices bubble thickly around the edge, 30-40 minutes. You may have to cover edge of crust with loose aluminum foil to keep from getting too dark.

    Remove from oven. Let cool for about an hour. Prepare the caramel by combining the remaining caramel quarters, butter and water and melt in a double boiler of barely simmering water. This may take 10+ minutes. When melted whisk until smooth and drizzle over the pie. Press in pecan halves and sprinkle with chopped pecans. Let cool.

    Thursday, December 10, 2009

    Spices and holiday cooking so far


    While we are waiting for Will to post the Carmel Apple Pecan Pie recipe, I thought I'd show a picture of the spices I won! I stumbled upon the website iLunchbox last summer and have occasionally entered to win some contests. I won last month and got all these spices (including real vanilla!) some mulling spices, hot chocolate mix, brining mix for a turkey (not sure if I'll ever use that one), hot buttered rum mix, two dry instant soup mixes and an apron from The Spice Hunter.

    It was pretty fun opening and unwrapping all the spices tonight - like an early Christmas. So many spices - it's going to take a long time to use them all up!

    Happy holiday cooking!! What have you all made so far? I made some of Grandma's peanuty white chocolate candies/cookies with rice crispies and marshmallows inside (I don't know the name of them). I got the recipe this past summer when we were there. It was funny because the first time I bit into one I immediately felt like I was back on the farm, since that is the only place I've ever eaten them. Also, I made some fudge last night. It turned out almost right, just a tad bit too crumbly when I cut it. I don't think I have the right size pan for my recipe. Anyone else have trouble with it getting a little too crumbly? And I made some microwave peanut brittle that is super easy. That's it so far - what about you guys?

    Wednesday, November 25, 2009

    Perfect Pie Crust

    Just in time for Thanksgiving, and by popular request, here is my adaptation of Betty's oil pie crust. Growing up this was the pie crust Mom would make and I learned how to make it from her. It was always a bit frustrating though because sometimes it would turn out great and other times... not so much, it would be crumbly and mealy instead of flaky.

    In 4-H when I made apple pie for the fair one year I made a crisco crust instead of the oil recipe to make sure it would turn out. However, my science nature has made me experiment with several hypotheses and keep trying to figure out how to make this recipe work, since I always have oil on hand, and not crisco, and of course, it's healthier, too.

    I do think I've figured it out; the crusts have turned out flaky ever since (several years). And for an early Christmas present I will share all my secrets with you!

    Here's the basic recipe and then I'll make some specific comments of the important things:

    Double crust for a 9-inch pie (though just barely enough - might want to make 1 1/2 recipes if you like to make sure you have enough or for a 9 1/2-inch pie)

    2 c. flour
    1 t. salt
    < 1/2 c. canola oil
    4-6 T. cold water

    - Mix the flour and salt with a fork in a bowl. Add the oil, and stir/mix until pea-size pieces form. Add in the water a couple tablespoons at a time, stirring, until mixed.

    ** Do NOT add too much oil. Use a little less than 1/2 c. Too much oil is the biggest cause of the 'mealy' pie crust. If the flour looks completely saturated with the oil then it's too much - add some more flour. It should still have some almost powdery white stuff after this step.

    ** Make sure you add in enough water. Even if after a couple tablespoons of water the dough is cleanly coming off the bowl, still add it all or at least add until there are nice, white, 'marbling' streaks through the dough.

    ** Do NOT wait to roll out the crusts. I used to make up the dough and then peel and cut the apples. This is a mistake! Get your filling completely ready and then make up the crust dough and roll immediately.

    ** Roll between two sheets of waxed paper. This isn't really different than the original recipe. Just thought I'd mention it for any oil-crust newbies out there. Make sure you get it thin and flip it over and peel off the waxed paper a couple times as you roll.

    Questions?

    Happy pie baking! (I think another recipe will be posted soon that should give you occasion to dig out the pie pans and get baking... Caramel Apple Pecan Pie! Yum!)

    Friday, November 13, 2009

    CNS photos


    Drying a field of delicious homemade egg noodles.


    Veggies simmering, chicken chillin' in the background.


    Wednesday, October 21, 2009

    Chicken Noodle Soup

    I made this soup last night. It is delicious and perfect for a crisp fall day.

    Ingredients:

    Soup
    1 Whole chicken, 2.5 - 3 lbs.
    6 Carrots
    4 Stalks of celery
    3 Onions, medium size
    8 Oz. frozen peas
    10 Sprigs fresh parsley
    1/2 Tb. dried thyme leaves
    1 Bay leaf
    3 Cloves of garlic
    Salt
    Pepper
    2 Tb. butter

    Noodles
    1 1/4 C. Flour
    1 Pinch of salt
    1 Egg
    1/4 C. Milk
    1/2 Tb. Butter

    Directions:

    First, make the soup stock. Throw the whole chicken into a large soup pot with enough water to not-quite cover the chicken. While heating the water, chop 2 carrots, 2 celery, and 1 onion roughly. Add these to the chicken-water. Also add 3 cloves of roughly chopped garlic, 1 bay leaf, a few sprigs of parsley, 1/2 T. thyme, salt, and pepper. Now, add more water so the chicken is covered. Cover the stock and bring it to a boil. Then, reduce heat and simmer for 1 hour and 15 minutes or so, until the chicken is nice and tender.

    While the stock is simmering, prepare the egg noodles, which are my 2nd favorite part of this soup. I only made them myself because I was too sore to ride my bike to the store to buy egg noodles, and I'm glad I was. Another benefit of marathoning.

    Stir together 1 1/4 C. flour and a pinch of salt. To the flour, add 1 beaten egg, 1/4 C. milk, and 1/2 Tb. melted butter (I combined these three in that 2 cup shaker Ann C. (aka mom) got us for Christmas). Mix well, then knead for 5 minutes. Roll out to about 1/4 in. thickness. Roll them back up into a log, like you would a sleeping bag, then cut into about 1/4 in. strips. They will expand a bit when cooked. Cut them to 2 inches in length as well. Then, put the noodles on a clean towel to let them dry out before cooking. They only need to dry about 2 hours, which is how long it takes the soup to cook! A match made in heaven.

    Ok, the noodles are made, and the stock is simmering away. Chop up the remaining carrots (4), celery (2), and onion (2) into quarter inch pieces.

    Once the stock is done simmering, strain the stock into a clean bowl or pot. Be sure not to pour it down the drain. You can discard the stock veggies, but keep the chicken. Some people skim fat off of the stock. I kept it, and it tastes good.

    In your now-empty stock pot, melt 2 Tb. butter and saute the carrots, onion, and celery for about 8 minutes.

    While the veggies are cooking, break down that chicken. You should be able to just pull the wings, legs, and thighs apart. I recommend doing so early and letting them cool off before handling too much. Pull the dark meat off the bird (legs, thighs, wings) and try some, because it is delicious, and also my #1 favorite part of this soup. Next, carve the out the breast meat-

    " The breastbone runs along the top center of the chicken carcass. Feel for it with your fingers. Make a 3-inch-long slit along both sides of the breastbone. Dig your fingers into one of the slits and peel the entire half of the breast meat off the carcass. Do the same to remove the breast meat an the other side." - Marion Cunningham

    Chop the meat into about 1/2 inch pieces. Add the meat, frozen peas, and reserved stock to the sauteed veggies, and simmer for about an hour. While the soup is simmering, flip those egg noodles over so the other side can dry.

    After 1 hour of simmering, chop the remaining parsley and add to the soup. Add the egg noodles as well, and simmer for an additional 10-15 minutes, or until the noodles are cooked.

    Enjoy!

    Monday, October 12, 2009

    that time of year...

    Hey all, instead of posting a proper recipe I thought it might be fun to ask everyone how they season their roasted pumpkin seeds, as I just did jack-o-lanterns and made some puree this last weekend.

    Fat / Salt purism aside, I like:

    Butter, Salt, Cumin, Cardamom and Yellow Curry (this is my regular spiced kind)

    Butter, Sugar, Ginger, Clove, Cinnamon (the pumpkin pie kind)

    What about everyone else?